13 March 2019
The rally bike is sold!
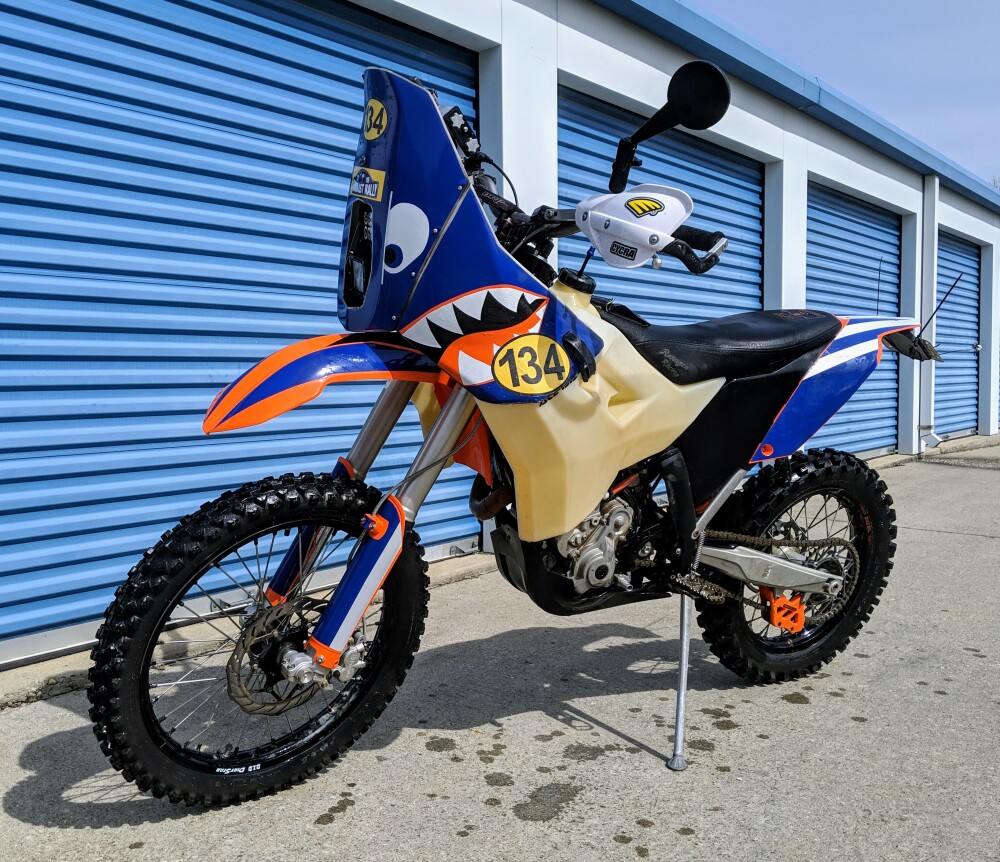
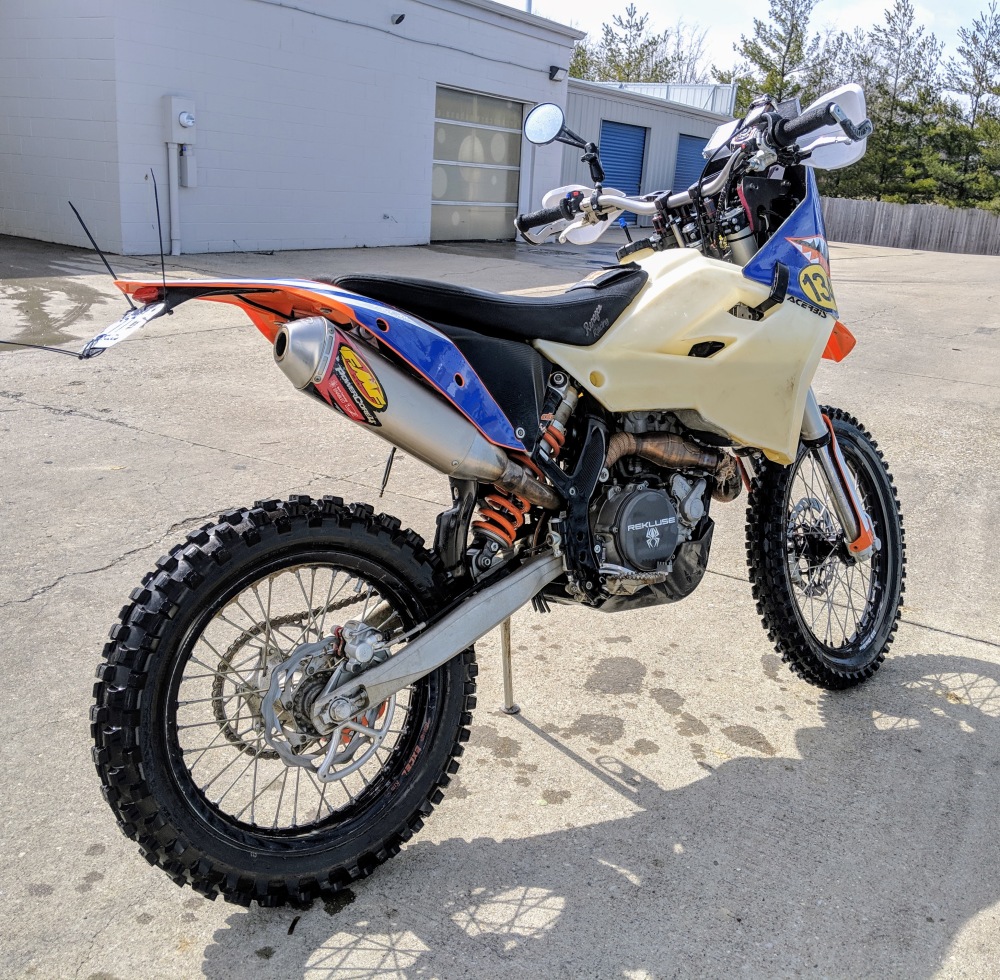
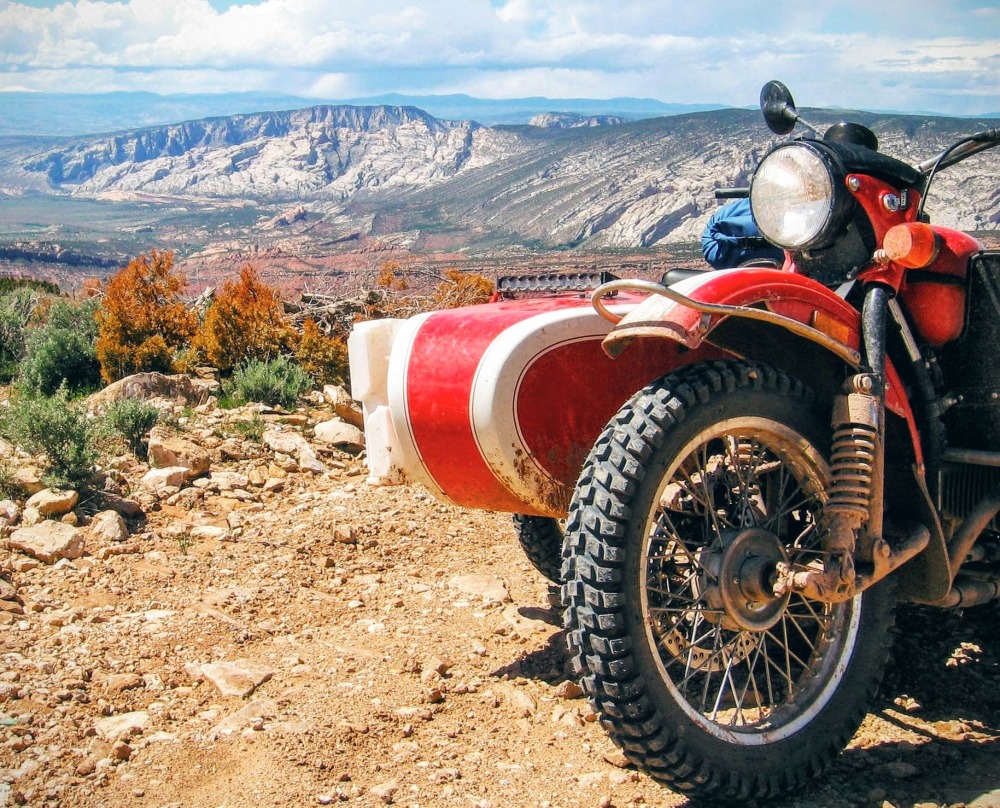
You can read a little bit about the history of the bike over here. Right now, it's set up like I had it at the 2019 Sandblast Rally.
 There are a bunch more photos here.
Highlights
 There are a bunch more photos here.
Recent Maintenance
- January 2019
- Rally Moto Kit fairing replacement
- new lithium battery installed
- changed oil and filter with Motorex synthetic 10W-50 and K&N filter
- switched to 15T front sprocket
- February 2019
- new tires (Shinko 546) and HD tubes
- new air filter installed
- new countershaft seal installed
- new countershaft bolt kit installed
- new seat bolt kit installed
 There are a bunch more photos here.
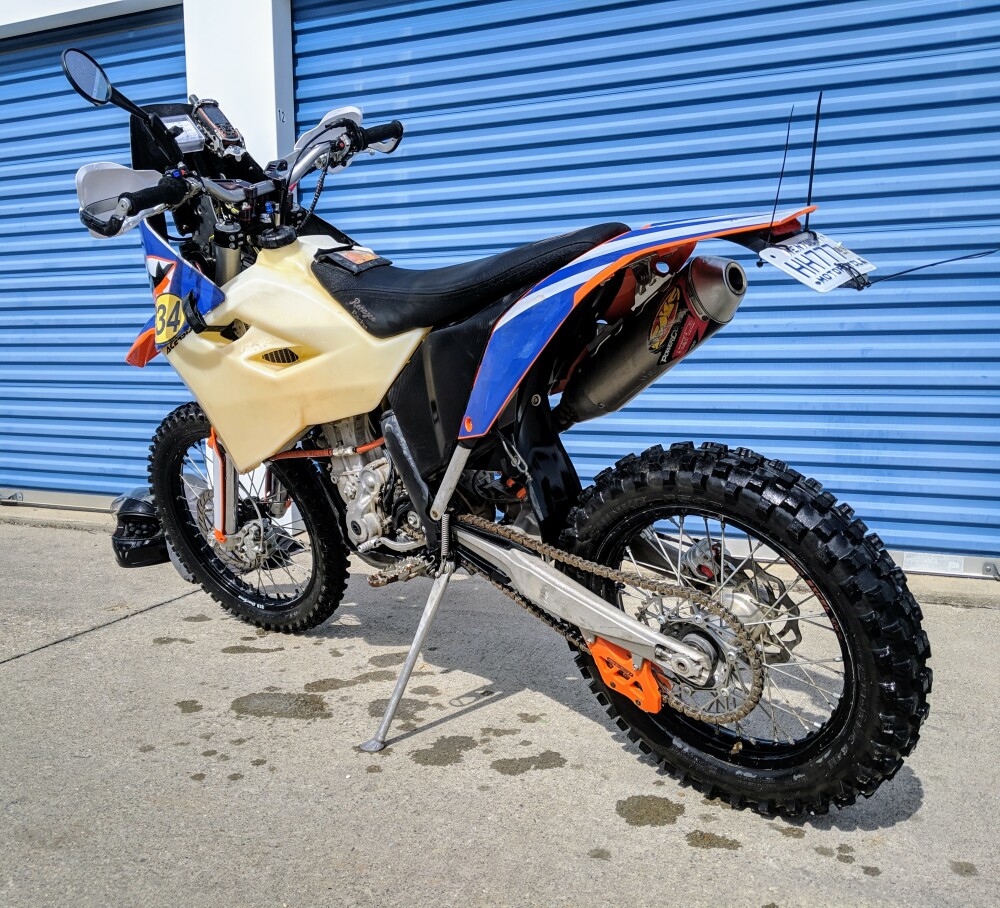
I've owned this bike since 2014. I raced it in the 2019 Sandblast Rally (bike prep details) at the beginning of March and it ran flawlessly. Before that, I mostly just used it to putt around on trails and do some light dual-sporting. Although it has served me reliably, it is really built to be a desert rally racer and isn't at home as a dual-sport or trail bike. I am more of a slow trail rider so I think it's time for the 505 to move on to a new home.
The bike has a license plate and is street-legal with a normal Kentucky street title in my name.
The rally bike has been sold; thanks to everyone who was interested.
 There are a bunch more photos here.
5 March 2019

Now that the rally is finished, I want to recap some of what worked and what I could do differently next time.

What Worked
-
The rally racing clinic on the Thursday before the race was really beneficial. It was a good introduction to the terrain that we would be racing on, and a good general refresher on riding off-road. While I have a lot of off-road riding under my belt, I have not ridden a lot over the last year. Also, the clinic did a great job explaining the logistics of rally racing and how the timing system works. On race day I felt pretty confident that I knew what I was doing.
-
The bike performed flawlessly. Although I did damage a fuel line during the rally racing clinic on Thursday, I was able to easily repair it at lunch and continue without any incidents on race day. The bike didn't miss a beat despite my complete lack of mechanical sympathy. Bonus: no flat tires.
-
I rode with an endurance race mindset. With a total of nine special stages, I rode conservatively to make sure that I still had energy left for the later stages. I stayed hydrated and fed—no bonking here.
-
Relating to the previous point, I also prioritized not crashing. Obviously crashing hurts, but even if it's a soft landing, a lot of energy is expended in picking the bike up and getting going again. I can't afford that.
-
I had fun. I'm not a competitive rider. Sure, it was great fun to occasionally pass someone, but for me it was more of an opportunity to legally ride as fast as I want (or can) in a controlled environment. If I saw someone coming up behind me, they had already proven themselves to be much faster than me (by gaining at least thirty seconds on me) so I just moved over and waved them by—everyone's happier that way.

What I Could Do Differently
-
The bike could take advantage of taller gearing. I topped out on the straights at around 80 mph. While that sort of speed on loose sand feels really fast, I know the bike has the power to easily go faster with taller gears. I could run a significantly smaller rear sprocket and gain some top speed without sacrificing bottom-end performance (since I was launching in 2nd gear anyways).
-
I need to learn to shift around my weight more. I was too focused on holding on and not focused enough on my body position, so there is considerable opportunity to increase my level of control by being intentional about managing my body position.
-
Commit to the line. Loose, rutted sand is a mind game. The bike will go where you look if you get on the gas and go for it. I was getting pretty comfortable with the straight sections but turns in the churned-up sand were still intimidating. This is an area where I need more practice to improve.
-
Push harder. I know the point is to have fun, but the point is also to go fast. This is a controlled environment: the course is closed to traffic and the turns and hazards are marked. I rode to conserve energy, but I left a lot more in reserve than I needed to.
-
Reduce the tire pressure. I ran with about 18 psi, but could have gone down to 15 or even 12 psi for a little more traction. This would help the bike feel a little more planted and hook up better while accelerating out of the corners.
-
Get in shape. I'm happy with how I did but I know that my own physical fitness is one of the big things that holds me back. Working to lose 40-50 lbs and improving my cardiovascular capacity would be a huge boost to my performance.

Summary
Overall, my entry in the 2019 Sandblast Rally was a success! I finished the race, didn't hurt myself or the bike, and had a lot of fun. Plus, I made some new friends. If time and resources allow, I would like to race again here or elsewhere in the future.

3 March 2019

I'm officially a 2019 Sandblast Rally finisher! As racer #134, I placed 10th out of 17 in my class (MM), and 22nd out of 41 bikes overall. Here are the official results from NASA Rally Sport. I wasn't wicked fast, but I didn't hurt myself or the bike, and I had a lot of fun in the process.
Now it's time for a nap.
27 February 2019
I'm heading down to South Carolina today to attend the rally racing clinic and then the Sandblast Rally itself. I am not bringing a computer with me, so I probably will not add any more posts until I get back.
In the meantime, follow my Facebook page and Instagram feed to stay up to date on how things are going.
Wish me luck!
26 February 2019


I've been out of town for about a month, so let's pick up about where we left off in January. Now it's only four days until the 2019 Sandblast Rally! I have a long list of things to take care of before I leave tomorrow; I think it's going to be a late night.
Rally Racing Clinic
A few weeks ago, I signed up for Bill Conger's rally racing clinic held on Thursday before the race. This will give me some productive seat time before shakedown on Friday and the race on Saturday—my main goal is to get reacclimated to the sand and reduce the chance of getting hurt. Plus, it looks like fun!
Bike Maintenance
My last work on the bike was the oil change and valve check, but I still have a leaky countershaft seal to replace. I have the parts here, and it's on my to-do list for tonight.
A few other bits need some attention tonight as well:
- Acerbis gas cap: my old cap was missing the rubber seal so gas leaks everywhere when it's full. Buying the whole cap assembly was the same price as just the rubber seal, so I guess I have an extra cap now.
- Seat bolt kit: the hollow aluminum bolt that holds some of the rear plastics on and is where the seat bolt goes through was stripped out, so I need to install a new one.
- Countershaft bolt and dome washer: the countershaft dome washer is intended to be replaced at every sprocket change. It comes with a new bolt (with preapplied threadlocker) so that will get changed out as well.
Finally, I need to mount the new tires. It's probably my least favorite maintenance item to deal with, but it needs to be taken care of tonight.
Packing
I'm not talking about packing my suitcase for the trip, but how I'm going to pack the required equipment onto myself and/or the bike. As I've discussed in a previous post, I need to carry a first aid kit and a few documents, and some water and/or sports drink would be good too.
I've been experimenting with carrying my Camelbak backpack while wearing my Leatt body protector, but it's not ideal since the neck brace interferes with where the backpack shoulder straps would normally go. I'll use the rollie bags and carry a water bladder in there instead of on my back. I think that there will be plenty of time during transit or waiting for my check-in times to snag a drink—I'm not going to be drinking on the stage regardless.
Reflectivity
The rules mandate a minimum of 10 square inches of reflective material on the front of my person or helmet, and another 10 square inches on the back (not obscured by any backpack). I have an inexpensive reflective safety vest that fits over the Leatt to satisfy this requirement.
Weather
The forecast for the rally racing clinic on Thursday is calling for some rain, but with temperatures expected in the 60s, it will still be good for riding. Hopefully the sand will drain well and keep the mud to a minimum.
The forecast for Friday and Saturday is looking great, with no rain and expected temperatures generally in the 60s. Good cloud cover is predicted for both days, minimizing those annoying sun-in-the-eyes sections.
24 January 2019
Part of the periodic maintenance on the KTM is to make sure that there's the appropriate clearance between the cam and the followers when the valves are fully closed. Too much clearance means that the valves are not opening the whole way and causes extra noise and wear from the drive train. Too little clearance means that the valves are not seating fully and can make the bike hard to start or cause burned valves because much of the heat is transferred to the head through the seat when the valve is closed.
As an engine wears over time, the valve clearance generally decreases as the hardened steel valve seats are very slowly pushed further into the aluminum head by the hammering of the valve. In this bike, there are small steel shims that fit in the cam follower to allow some adjustment. If the clearance is less than the appropriate amount, the shim is replaced with a slightly thinner (like by 0.0015") shim so that the cam-to-follower clearance is corrected.
The specifications for this motor call for 0.003-0.005" clearance for the intake valves and 0.005-0.007" clearance for the exhaust valves—this is measured when the engine is cold. The clearance for the exhaust valves is usually specified to be more than the intake valves because they will get hotter and expand more than the intake valves.

Although space is a bit tight, checking the valve clearance in an RF4 motor is really straightforward.
- Remove the fuel tank to get easy access to the top of the engine.
- Clean the top of the engine so you don't accidentally get any dirt inside the head.
- Pull out the spark plug lead.
- Remove the three bolts holding down the valve cover.
- Carefully remove the valve cover. The gasket is rubber and can be re-used if you do not damage it.
- Rotate the engine so that it is TDC in the compression stroke. There are many ways to do this.
- Measure the clearance between the cam and follower using feeler gauges.
If you have to swap shims to adjust the clearance, you need to remove the cams and it gets a little bit more finicky. Fortunately, all of the valves on the bike were in spec, so I just buttoned it back up. I'm a little surprised that everything was in spec—I think it means I just need to ride the bike harder!
It was nice to do some maintenance that didn't actually require any expense other than my time.
24 January 2019
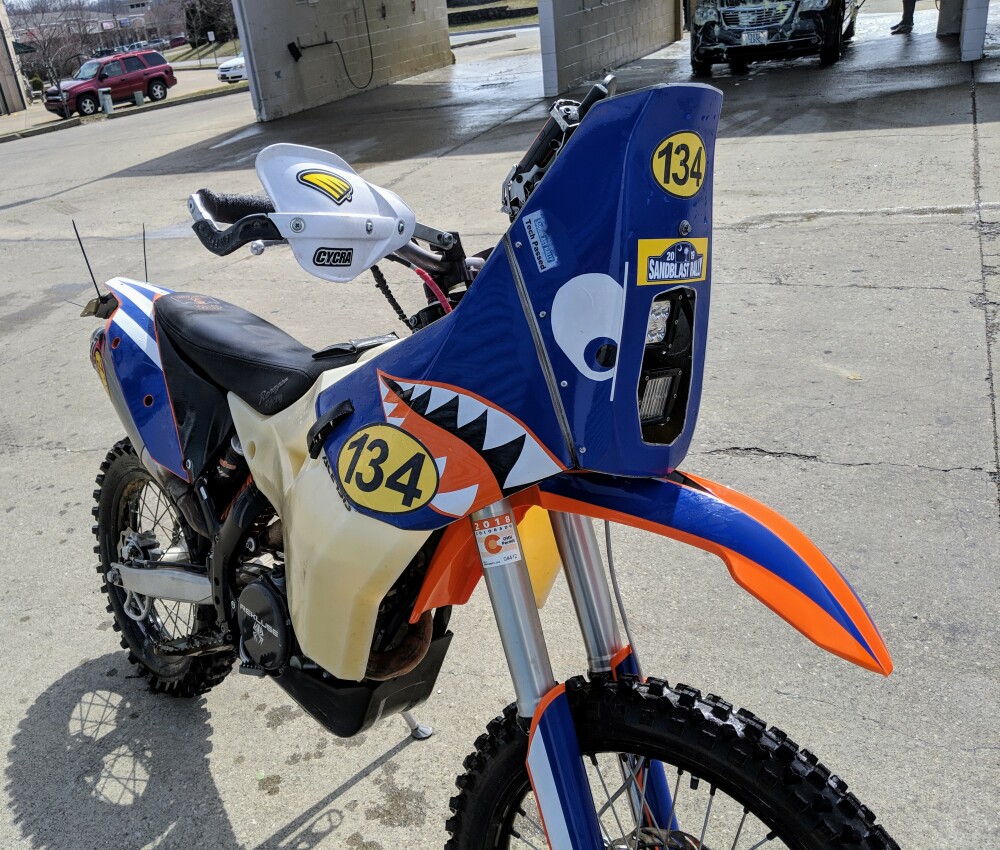
It's long overdue, but I was busy with other things recently. Last night I finally finished the vinyl on the fairing! I zipped home from work at lunch today to pull the bike out into the daylight for a few photos.
I love how it all came out. There were a few points in time where I was a little skeptical about how it was going, but in the end the effort was totally worth it. I'm neither an artist nor a professional wrapper, but I'm thrilled with the result.

Of course, now there's a huge pile of scraps still on my kitchen table that I should probably clean up soon.
23 January 2019
This evening I changed the oil on the KTM. Unlike some other KTM models (cough cough RFS cough cough), the RF4 motor in the 505 XC-F is pretty easy to service. I used 1.25L of Motorex 10W-50 synthetic oil and a K&N filter, and it was all finished in about 25 minutes. No fuss, no mess!
I also wanted to change the countershaft (front) sprocket from a 13-tooth sprocket to a 14-tooth sprocket. This will give me a little more speed for the same RPMs. I previously was using the bike for more trail riding. I have a 46-tooth sprocket on the rear wheel and I'll leave that as it is.
Changing the countershaft sprocket on a KTM dirt bike is pretty easy. I loosened the rear axle and slid it forward, giving me plenty of slack in the chain. I also loosened the countershaft sprocket guard and moved it out of the way. After removing the countershaft sprocket bolt and dome washer, it was easy to slip the 13T sprocket off.
At this point I noticed there was a bit more oil there than there should be—the countershaft seal was leaking a little. This is a normal wear item, so it's fairly easy to replace. Unfortunately, I had to order the parts (about $25 in total), so I finished the sprocket swap without addressing the leak. The parts should be here at the end of the week and then I can replace the seal.
On the plus side, the chain was already long enough to handle an additional tooth on the countershaft sprocket without having to add a another link.
22 January 2019
In order to get a NASA rally license, you have to see a doctor and fill out a medical evaluation form. The doctor will check your usual vitals, test your peripheral vision and neurological function, and make a determination as to whether or not you are fit to receive a rally license. Since this is directly related to getting the rally license, I included it on the expenses list in the Entry category.
Keep in mind that health insurance doesn't cover things like this. If you are due for an annual physical, your doctor may be able to complete this as part of the physical since basically everything in here should be something they're already doing.
The main goal of the evaluation is to make sure that you don't have any underlying condition that might preclude competitive motorsports. If you have a history of seizures or blackouts or a trick heart, then you probably shouldn't be racing and your doctor will tell you that. So don't stress out about it if you're out of shape (like me) but otherwise generally healthy—you're in good company.

I already had my annual physical recently, so I went down to the local walk-in clinic for this since I was going to be paying out of pocket. The evaluation itself took about 20 minutes (after about a 30 minute wait) since I had already filled out my medical history on the form before meeting the doctor.
Once you have the form completed, you can scan, fax, or mail it to NASA Rally Sport. Depending on your age, you may not have to deal with it again for a few years.
21 January 2019
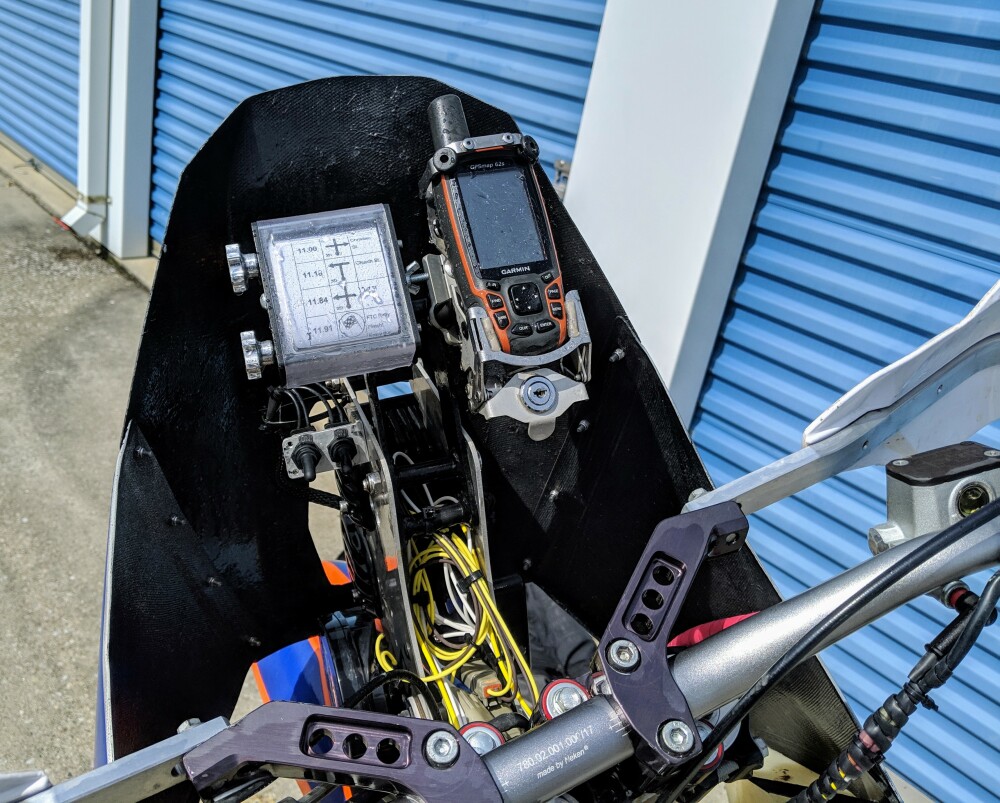
Navigation at Sandblast is done by way of a roll chart (a.k.a. route sheet or road book), so I need to mount a roll chart holder to the KTM. Since the roll chart will be a narrow enduro-style roll chart, I chose to use the Enduro Engineering roll chart holder. It is inexpensive and mounts easily to just about anything thanks to a clever mounting solution involving some bits of rubber hose and a hose clamp.
I've mounted the roll chart holder high on the nav tower, on the left side. This way I can advance the roll chart without taking my hand off the throttle.
In addition to the roll chart holder, I do generally have a GPS mounted to the bike to give me basic information like time and speed as well as the ability to display and record tracks. While Sandblast does not provide GPS tracks for navigation, knowing the time is pretty important and it will be interesting to overlay the tracks onto a map for later perusal.
I use a Garmin 62 GPS, mounted to the right of the roll chart reader in a locking, vibration-damping Touratech cradle. This keeps it easily visible when I'm riding and relatively secure when I'm parked.

I still need to pick up a cheap, simple digital watch to strap up front for timekeeping purposes. While the GPS has a clock, presumably accurate, I need a clock that I can synchronize to the official race time. Seconds matter!
15 January 2019
I've decided to make some custom graphics for the bike. The previous owner of the fairing did a cool Star Wars-themed paint job, but I want to go a different direction. The previous owner of the bike was kind enough to send me the outlines for the custom graphics that he previously had on the bike, so I have that to start with.

Yesterday, I printed the outlines; it came to a total of 42 pages that I need to cut up and tape together into fourteen different stencils. I started by labeling each of the stencils on a "map" and then went through each of the 42 pages and labeled each piece of each stencil so I didn't get anything mixed up. It took about a half hour to identify and label all of the pieces.

Each of part of each stencil needs to be carefully cut out of the page so that the stencil pieces can be taped together into a complete stencil. I pulled out my trusty paper cutter, razor blade, and scissors, and got to work. This took forever. I don't ever want to see a pair of scissors again.

It got pretty late so I called it a night with the stencils cut and sitting on my kitchen table.
This evening I got back to work. I cut a piece of vinyl sized to fit a stencil and taped it flat to my workbench. Then I took the appropriate stencil and taped it down onto the flattened piece of vinyl. Finally, I carefully cut out the vinyl in the shape of the stencil.

The vinyl is then carefully applied to the body of the KTM. I pulled the fairing and plastic off of the bike so it's a bit easier to work with.
It's getting late again, so I'll have to finish it later. Here's a sneak preview.

I'm excited about how it's all going to come out; I can't wait to show you all the finished product!
11 January 2019
The bike is full of mud from the last time I took it out on the Redbird Crest Trail down in the Daniel Boone National Forest.

Step one to getting it cleaned up is to take it to a self-serve car wash to hit it with some soap and water. However, it's currently winter, and water tends to become rather solid at temperatures below freezing, making cleaning the bike a bit of a challenge. Fortunately, the temperatures today were forecast to rise up to a balmy 35°F, slightly above freezing.

I bundled up and rode the bike to work today with the hopes that it would be above freezing around lunchtime and I could ride over to the car wash to get it cleaned up without the risk of everything freezing solid before it dried. (Our Kentucky winters are relatively mild; the local self-serve car wash uses warmed water and appears to stay open year-round.)
By 12:30 p.m., it was up to 30°F and the sun was out—that was close enough for me.

After a quick spraydown, I rode bike back home and parked it in the garage. The garage isn't directly heated but it's unusual for it to get below freezing in there.

Now I wouldn't quite call the bike "clean", but at least it's not muddy anymore. This weekend I'll pull off the bodywork and start to make sure that everything is race-ready under the skin.
10 January 2019
The current tires on the KTM are fine for casual trail riding around here, but not really race-ready. There's a Bridgestone M403 on the front, a motocross tire which was discontinued a few years ago, and a Dunlop MX81 on the rear, which is a little newer but is showing some wear.
While they'd surely get me through the race, I like to stack the deck in my favor as much as is allowed and opted for some new shoes. Since most of the special sections of Sandblast are run on very sandy roads—as one should expect from the name—I went with a pair of Shinko 546 soft-intermediate terrain tires.

Being "soft-intermediate terrain" tires means that they're made from a harder rubber and with a wider-spaced tread pattern in order to provide good traction in softer terrain. The trade-off is reduced traction on pavement, which is acceptable given that the real racing primarily occurs on the soft stuff. I don't have any prior experience with this specific tire model, but they are inexpensive and seem to be pretty well-liked. Realistically, as long as there's air on the inside and some knobs on the outside, the tire isn't going to make or break the race for a novice competitor such as myself.
Like most real off-road tires, these tires are not DOT-approved for highway use. In some states, DOT-approved tires are technically required, though this seems to be rarely enforced. South Carolina, where Sandblast is held, does not require (as far as I can tell) that tires be DOT-approved for highway use in order to be legally used on public roads. The race regulations also do not specify that DOT-approved tires are required.
The rear tire is a 110/100-18 size, which is the widest variant that will fit my bike. Shinko do make a 120/100-19 but that's for the 19-inch rear wheels normally found on motocross bikes. Enduro bikes, like my bike, typically have an 18-inch rear wheel diameter. Normally I tend to run a wider tire, but I think the difference will be negligible, especially on the softer terrain.
The front tire is a 90/100-21 size, which is sometimes referred to as a "fatty" front tire. It's a size bigger than the usual 80/100-21 or 90/90-21 front tires, which raises the front end a hair, adds a little more front-end cushioning, and slightly changes the steering geometry. The steering geometry change tends to add a little bit of directional stability, which is always welcome in sand. (For what it's worth, I'm not running a hydraulic steering stabilizer on the bike.)
While normally I run with the front and rear tires each stuffed with a mousse instead of a tube so I don't have to worry about flats, the use of mousses is not allowed at Sandblast. Sad panda. I picked up a set of heavy-duty Kenda rubber tubes to keep the air where it's needed. I'll have spares at the truck so I can change if needed, but I'm not planning on any trailside tube patches during the race.
In the meantime, I'll keep running the old tires. I'll spoon the new ones on before I head down to Sandblast, but there's no reason to change them quite yet.
9 January 2019
Obviously it's generally a good idea to carry a first aid kit when you're out riding. In this case, a first aid kit is specifically required by the rules. It states that at a minimum, the first aid kit should consist of:
- Gauze pads or rolls
- Adhesive tape
- Elastic bandage (like an Ace bandage)
- Safety pins or clips for the elastic bandage
- Scissors or knife
- Emergency blanket
- First aid manual
It's basically impossible to find an off-the-shelf first aid kit with just those items, so I purchased an inexpensive but relatively comprehensive home first aid kit. I pulled the required items out of the kit, along with a few more things:
- Nitrile gloves (2 pairs)
- Alcohol-free sterile wipes
- CPR face mask
- Instant cold compress
- Gauze trauma pad (5x9-inch)

I've taken everything and packed it into a gallon-sized ziplock bag. Note that the scissors are quite sharp however they have blunt ends so I don't think they'll inadvertently puncture the bag or anything in it. This bag will go, along with a folding FMVSS #125 warning triangle and the required OK/help placard, into a small bag mounted on the back of the bike or into my hydration pack. I haven't figured out storage yet, but according to the rules, it can be either mounted to the bike or mounted to me—either is acceptable as long as it is easily accessible.

Generally I like to minimize what I'm carrying on my back, but I need to assess how things could mount to or fit on the bike—it might just make more sense to throw everything into my hydration pack. I'll write a post later on how I'm carrying the required equipment once I sort everything out.
It's important to be prepared, but here's hoping that I won't have to use anything in the first aid kit on myself or anyone else!
Update
After talking to one of my friends who is a medical professional, I upgraded the scissors to a proper pair of trauma shears. They're inexpensive and far more versatile than the super basic scissors that were included with the home first aid kit. I also added an Israeli bandadge and SAM Splint. The whole kit is a little more bulky now, but still not much heavier.
9 January 2019
The 2019 Sandblast Rally has an entry fee that varies based on what type of vehicle you are competing in and when you register. Since I am a first-time competitor, I was eligible for early entry, which began in late December. For motorcycles, the early entry fee was $290. Notably, this is an increase of $30 from last year.
But that's not all. Since Sandblast is part of the NASA Rally Sport (NRS) Atlantic Rally Cup, I need to become a member of NRS—not to be confused with the spacegoing NASA---and also obtain a NASA rally license. In order to become a member of NRS, I just had to part with $45 for a 1-year membership; easy-peasy.
To get a NASA rally license, there's an extra step. In addition to the $65 rally license fee, I also had to get the medical form completed by my doctor and sent over to NRS. This isn't anything crazy, just a quick once-over and sign-off that you're shipshape and safe to race. No one wants you to have a seizure or heart attack while you're on the course.
So that's $400 in fees just to get in the door.
8 January 2019
Motorcycle racing isn't cheap.
In the interest of full transparency, here's a tally of my costs involved. I've grouped the expenses into several categories:
- Entry: entry and administrative fees
- Racer: things for me
- Vehicle: things for the bike
- Cosmetic: things related to making the bike look good
- Travel: things related to getting to and from the event
Keep in mind, as I have been riding for years, I already have a lot of motorcycle gear. Don't consider this an exhaustive list of what's needed to participate in an event like this—notably, I also did not include any food costs. Most items in the list are linked to a relevant blog post.
Total cost: not cheap
Although the entry fee for Sandblast is relatively low, that's only a small part of the expense of participating in an event like this. Many thanks to my coworker and friend Andrew for his support in getting me to the 2019 Sandblast Rally.
8 January 2019
Racers participating in the Sandblast Rally are required to have chest and back protection—this is common gear for motocross and enduro racers. However, as just a casual rider, I typically wear an armored jacket like one normally does for street riding. So I needed to find a hard-shell chest and back protector to wear for the race.
Neck protection is also a thing. Leatt are the best-known name in neck protection in the motorcycling world. The Leatt neck braces are probably better described as neck restraints, with a similar function to a HANS device in the auto racing world.
In conjunction with a full-face helmet, the Leatt neck brace helps limit extreme movement of the neck by dispersing forces to the shoulders and chest. While this doesn't prevent all neck injuries, it reduces the risk of severe neck injury during a crash. Leatt have been making a variety of CE-approved neck brace models for the past decade.
Neck restraints are not required by NASA RallySport (the sanctioning body behind Sandblast) for competitors in either cars or bikes, however I think it's a wise choice (and there's data to back that up). I was able to find a lightly-used Leatt Fusion 3.0---a chest and back protector with an integral Leatt neck brace—on the secondhand market for essentially half price, so I snapped it up.

It arrived today, and it fits comfortably. This one has shoulder pads, which is a nice bonus. And yes, that's a bathroom mirror selfie—I'm classy like that.
8 January 2019
After the incident bringing the bike home from the storage unit, it was clear that a new battery was needed. I ended up ordering a WPS Featherweight lithium battery while I was waiting around in the parking lot for roadside assistance to come and give me a jump. It arrived today! Hurray!

The current battery in the KTM is an old lithium battery by Sycl (no longer in business) that has been in the bike for at least five years. It might be salvageable but I feel like it's worth the relatively low cost to replace it, especially since
- the KTM 505 XC-F has no kickstarter and
- the Rekluse auto-clutch means that push-starting it requires some tools.
I really want the magic button to work reliably.

I chose the WPS battery because it was an affordable, lightweight, and of course won't spill when I dump the bike if the bike needs a nap. It has an integrated battery capacity indicator on top that gives you a low/medium/high indication by way of some LEDs at the press of a button. I know that it's more a gimmick than anything else, but it is cool.

The new battery slipped right in and the cables attached to the terminals without any interference; there's good power to the lights and fan now. It's a bit late tonight to fire it up—the neighbors have little kids that I don't want to wake up—but I'll take it out for a spin (probably to the car wash) tomorrow.

4 January 2019
The KTM is equipped with a first generation Rally Moto Kit by my friends at Motominded. Unlike the second generation (released just last December), which uses a factory KTM 450RR windscreen, the first generation used a custom fiberglass fairing.
Here you can see what it looked like on that first day I brought it home:

A few months later, I was riding the bike with a friend out in North Carolina when I had a slight mishap. While both the bike and I were largely unscathed, the fairing suffered a mortal blow and ripped into two pieces.

Only a handful of the first-generation Rally Moto Kits were made, and spare fiberglass was nigh impossible to find. Even the original molds were no longer serviceable, so no more could be made.
This is repairable if you are good with fiberglass. However, I'm not, so I've been riding the bike since 2014 with no fairing at all. The fairing did provide some useful wind protection, but the navigation tower still does a great job of holding my GPS and gives a place to mount the headlights.

Recently—with Sandblast in mind—I inquired with Motominded if they thought that the KTM 450RR windscreen used in the second-generation could be somehow mounted to the first-generation Rally Moto Kit. The short answer was, unfortunately, "not easily", but they were able to refer me to a mutual friend who had a second set of fairings from the first-generation model.
He was willing to sell me his second set of fairings at a very reasonable price, and they arrived just recently. A talented previous owner had painted them with a Star Wars theme, which I think is awesome, and the paint job is holding up pretty well.

Since I brought the bike home to my garage last night, I couldn't resist a quick test-fit of the fairing. I was expecting to need some tweaks since these are older bikes and might be a little tweaked here and there themselves, but it fit easily without any need to "use the force" to make things line up.

I'll need to find a few pieces of hardware finish mounting it properly, but it's starting to look like a real rally bike again!
<script type="text/javascript">
3 January 2019
Now that the KTM is street legal, it's time to get it from the storage unit where it lives over to my tiny garage. This means I need to ride the Crosstourer over to the storage unit, jump-start the KTM (since the battery is kaput), tuck the Crosstourer into the storage unit, and then ride the KTM back to my garage. No problem, right?
Well, I made it part of the way home before I turned off the choke and promptly killed the motor. Oops. The bike doesn't warm up very quickly in the near-freezing winter weather. There was not enough juice in the battery to restart the bike, so I called roadside assistance for a jump. Prepared for a long delay, I ordered a new battery while I sat there waiting for help to arrive.

Fortunately, the tow truck showed up after only about twenty minutes. With a boost from a big battery, the bike started easily and I made it the rest of the way home without any issues.
The new battery should arrive next week.
31 December 2018
I bought my first real motorcycle back in 2005. It was a 1981 Suzuki GS550 that mostly ran and sometimes ran well enough to get me to class and back. I was hooked. The GS550 was quickly followed by a 1983 Honda Nighthawk 650 that was smooth and reliable and took me to and from work, school, and all over East Texas—rain or shine.
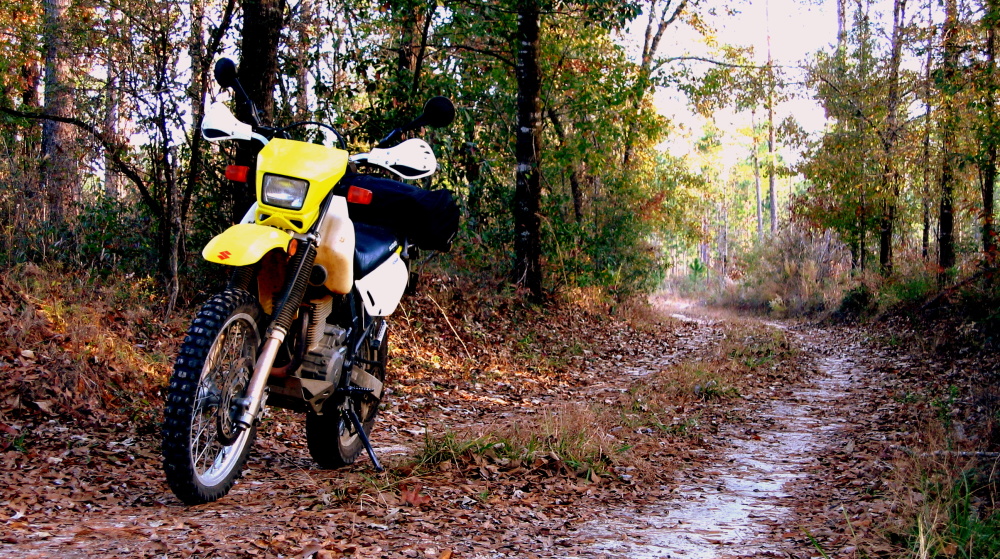
A long list of bikes have since graced a spot in my garage. In 2011, I was introduced to the art of off-road riding by a Suzuki DR650, and I was quickly sucked into the world of dual-sport and adventure riding. I've been riding a mix of on-road and off-road ever since. Currently, I own a 2009 KTM 505 XC-F and a 2016 Honda VFR1200X.
I attended the 2018 Sandblast Rally as a course volunteer; after seeing the action up close, I knew I had to try it for myself. I have accumulated thousands of miles of experience riding off-road on big adventure bikes (like my Moto Guzzi Stelvio and Africa Twin), dirt bikes, and even a Ural sidecar rig.
On March 2, 2019, I left the starting line at 8:46:00 a.m. and launched into the 2019 Sandblast Rally as a competitor. A little less than 10 hours later and a lot muddier, I rolled to the finish line to hand in my timecard as a finisher. What a blast!
2019 Sandblast Rally Racer Prep
31 December 2018
I rode a 2009 KTM 505 XC-F for the 2019 Sandblast Rally. This bike was modified with a frame-mounted nav tower and fairing that was originally made by MotoMinded for Neduro's 2012 Dakar entry. Before I purchased the bike, it had also been raced by Ned in the 2013 Touareg Rally and the 2013 Baja Rally, so if I didn't make it to the finish, it wasn't because of the bike!

2019 Sandblast Rally Bike Prep
31 December 2018
Race vehicles for the Sandblast Rally need to be registered and insured street-legal vehicles. I hadn't yet gone through that process for the KTM, and I had some concern that I might need to jump through some extra hoops since KTM originally only sold the 2009 505 XC-F as a off-road vehicle.
Inspection
The bike was previously converted from an off-road vehicle to a street vehicle in Colorado, which means that it went through an inspection process and received a title and license plates like any other street-legal bike or car. However, I'm not in Colorado anymore; any vehicle coming into Kentucky from outside the state requires an inspection by the county sheriff's office.
The sheriff's inspector verifies that the VIN number on the frame matches the VIN number on the documentation, and they check for some basic mechanical requirements--here's a non-exhaustive list based on my observation of the process:
- taillight
- brake light activated by at least one brake
- headlights
- horn
- tires, general appearance and condition
- generally operable condition
Note that neither DOT-approved tires nor turn signals are required on motorcycles to be registered in the state of Kentucky.
I first took the bike to the inspector at my nearest county clerk's office. This is where I've done the paperwork for my other vehicles and it's generally been a painless process. Unfortunately, the inspector there was not really well-informed on the law or motorcycles in general and refused to inspect the bike since it was not equipped with turn signals.
The inspector was using an inspection checklist that was clearly written for cars, so I pointed out to him that no motorcycles are equipped with doors, which were also on his checklist. It went predictably downhill from there and I left a bit frustrated and without the inspection that I needed in order to register the bike.
I called the sheriff's office to confirm with them that turn signals were not required. They suggested trying another inspector so I traveled across the county to the county clerk's other office location. There the inspector was much more informed and gave me a passing inspection without any issues despite copious amounts of mud caked everywhere and a mostly-dead battery.
Insurance
I was able to easily add the KTM to my existing motorcycle policy online without any roadblocks. My annual insurance premium actually decreased by about $50 with the addition of the bike.
Registration
Armed with a passing inspection and proof of insurance, getting the bike registered in Kentucky was as simple as handing the clerk the Colorado title, the inspector's report, and freshly-faxed proof of insurance. After handing over some hard-earned cash to cover the taxes and fees, I was able to walk out with some fresh plates.

Success!

